- shares
- Facebook Messenger
- Gmail
- Viber
- Skype
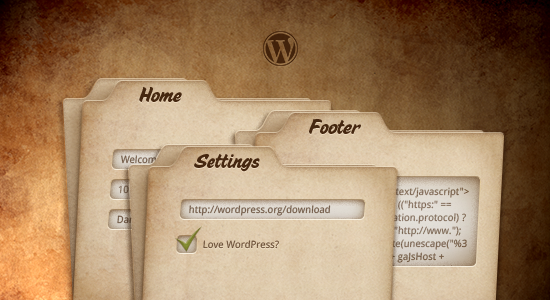
Sử dụng giao diện tabs giúp bạn tổ chức tốt nội dung mỗi tabs nội dung riêng biệt được trình bày ở mỗi tab khác nhau.
Giao diện wordpress (wordpress theme) có cung cấp cho bạn cách thức tạo tabs trên trang quản trị admin cũng giống như wordpress đang sử dụng.
Creating The Tabs
Đoạn code này sinh ra các nhãn tabs , theo chiều ngang:
// Create WP Admin Tabs on-the-fly.
function admin_tabs($tabs, $current=NULL){
    if(is_null($current)){
        if(isset($_GET['page'])){
            $current = $_GET['page'];
        }
    }
    $content = '';
    $content .= '<h2 class="nav-tab-wrapper">';
    foreach($tabs as $location => $tabname){
        if($current == $location){
            $class = ' nav-tab-active';
        } else{
            $class = '';
        }
        $content .= '<a class="nav-tab'.$class.'" href="?tab='.$location.'">'.$tabname.'</a>';
    }
    $content .= '</h2>';
        return $content;
}
Nguyên lý: theo như đoạn code trên, toàn bộ nội dung tabs được sử lý trên trang hiện tại. Thông qua tham số URL page bạn nhận biết đang ở tab nào, sử dụng $_GET[‘tab’]. Nếu tab hiện tại thì thêm css class=’nav-tab-active’.
Truyền tham số chứa nhãn tabs vào hàm admin_tabs để hiển thị. Ví dụ sau tạo 3 tabs có tên hiển thị là: tab1,tab2,tab3 . Mỗi tab có giá trị nhận biết tương ứng.
$my_plugin_tabs = array(
    'my-plugin-tab1' => 'tab 1',
    'my-plugin-tab2' => 'tab 2',
    'my-plugin-tab3' => 'tab 3'
);

echo admin_tabs($my_plugin_tabs);
Sử lý nội dung tab.
Xác định tab bởi tham số $_GET[‘tab’].
if(isset($_GET['tab'])){
switch($_GET['tab']){
	case 'my-plugin-tab1':
	?>
		tab 1 content
	< ?php
	break;
	case 'my-plugin-tab2':
	?>
		tab 2 content
	< ?php
	break;
	case 'my-plugin-tab3':
	?>
		tab 3 content
	< ?php
	break;
	default:;
}
}
Ví dụ bài tập: Tạo trang lựa chọn options, có form và các thành phần ,nhấn nút lưu để lưu một số thông tin trên form.
Để tạo page thì sử dụng add_submenu_page, bài tập này ta dùng form để sửa cài đặt của theme, do vậy ta sẽ dùng hàm add_theme_page (hàm này kế thừa từ hàm add_menu_page). Tuy nhiên bạn cũng có thể dùng hàm add_menu_page tạo dưới menu theme (Appearance).
add_submenu_page( 'themes.php', 'My Theme Options', 'My Theme Options', 'administrator', 'my-theme-slug', 'settings_page');
Sử lý nội dung tab.
Hàm callback của add_theme_page.
function ilc_settings_page() {
   global $pagenow;
   $settings = get_option( "ilc_theme_settings" );

//generic HTML and code goes here

if ( isset ( $_GET['tab'] ) ) ilc_admin_tabs($_GET['tab']); else ilc_admin_tabs('homepage');
Nếu truyền tham số tab thì lấy tab chỉ định còn không quay về tab mặc định. Ở đây có hàm ilc_admin_tabs để sử lý nội dung.
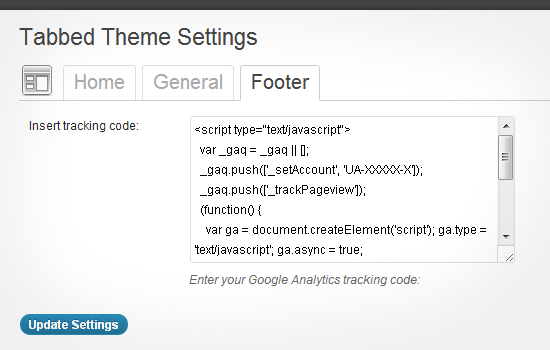
Đoạn code sau đây là nội dung hàm ilc_admin_tabs , chúng ta cho hiển thị các form fields phụ thuộc vào giá trị của $tab. Hiển thị một vài fields cho homepage và một vài fields cho các tabs khác.
<form method="post" action="<?php admin_url( 'themes.php?page=theme-settings' ); ?>">
< ?php
wp_nonce_field( "ilc-settings-page" );

if ( $pagenow == 'themes.php' && $_GET['page'] == 'theme-settings' ){

   if ( isset ( $_GET['tab'] ) ) $tab = $_GET['tab'];
   else $tab = 'homepage';

   echo '<table class="form-table">';
   switch ( $tab ){
      case 'general' :
         ?>
         <tr>
            <th>Tags with CSS classes:</th>
            <td>
               <input id="ilc_tag_class" name="ilc_tag_class" type="checkbox" <?php if ( $settings["ilc_tag_class"] ) echo 'checked="checked"'; ?/> value="true" />
               <label for="ilc_tag_class">Checking this will output each post tag with a specific CSS class based on its slug.</label>
            </td>
         </tr>
         < ?php
      break;
      case 'footer' :
         ?>
         <tr>
            <th><label for="ilc_ga">Insert tracking code:</label></th>
            <td>
               Enter your Google Analytics tracking code:
               <textarea id="ilc_ga" name="ilc_ga" cols="60" rows="5">< ?php echo esc_html( stripslashes( $settings["ilc_ga"] ) ); ?></textarea><br />

            </td>
         </tr>
         < ?php
      break;
      case 'homepage' :
         ?>
         <tr>
            <th><label for="ilc_intro">Introduction</label></th>
            <td>
               Enter the introductory text for the home page:
               <textarea id="ilc_intro" name="ilc_intro" cols="60" rows="5" >< ?php echo esc_html( stripslashes( $settings["ilc_intro"] ) ); ?></textarea>
            </td>
         </tr>
         < ?php
      break;
   }
   echo '</table>';
}

?>
   <p class="submit" style="clear: both;">
      <input type="submit" name="Submit"  class="button-primary" value="Update Settings" />
      <input type="hidden" name="ilc-settings-submit" value="Y" />
   </p>
</form>
Lưu fields
Các giá trị của fields cần phải được lưu lại sau khi nhấn nút save. Lấy fields để lưu dựa vào form của tab đang làm việc.
function ilc_save_theme_settings() {
   global $pagenow;
   $settings = get_option( "ilc_theme_settings" );

   if ( $pagenow == 'themes.php' && $_GET['page'] == 'theme-settings' ){
      if ( isset ( $_GET['tab'] ) )
           $tab = $_GET['tab'];
       else
           $tab = 'homepage';

       switch ( $tab ){
           case 'general' :
         $settings['ilc_tag_class'] = $_POST['ilc_tag_class'];
      break;
           case 'footer' :
         $settings['ilc_ga'] = $_POST['ilc_ga'];
      break;
      case 'homepage' :
         $settings['ilc_intro'] = $_POST['ilc_intro'];
      break;
       }
   }
   //code to filter html goes here
   $updated = update_option( "ilc_theme_settings", $settings );
}
Ok dữ liệu form đã được lưu lại, bây giờ đưa user quay trở lại trang có chứa tabs với tab hiện tại.
function ilc_load_settings_page() {
  if ( $_POST["ilc-settings-submit"] == 'Y' ) {
   check_admin_referer( "ilc-settings-page" );
   ilc_save_theme_settings();

   $url_parameters = isset($_GET['tab'])? 'updated=true&tab='.$_GET['tab'] : 'updated=true';
   wp_redirect(admin_url('themes.php?page=theme-settings&'.$url_parameters));
   exit;
  }
}
Vậy là đã xong, các bạn có thể download code về để tham khảo.
Để nhận được bài viết mới vui lòng đăng ký kênh kiến thức WordPress từ A-Z ở Form bên dưới. Bạn cũng có thể nhận được sự trợ giúp trên Twitter và Facebook
- shares
- Facebook Messenger
- Gmail
- Viber
- Skype

